

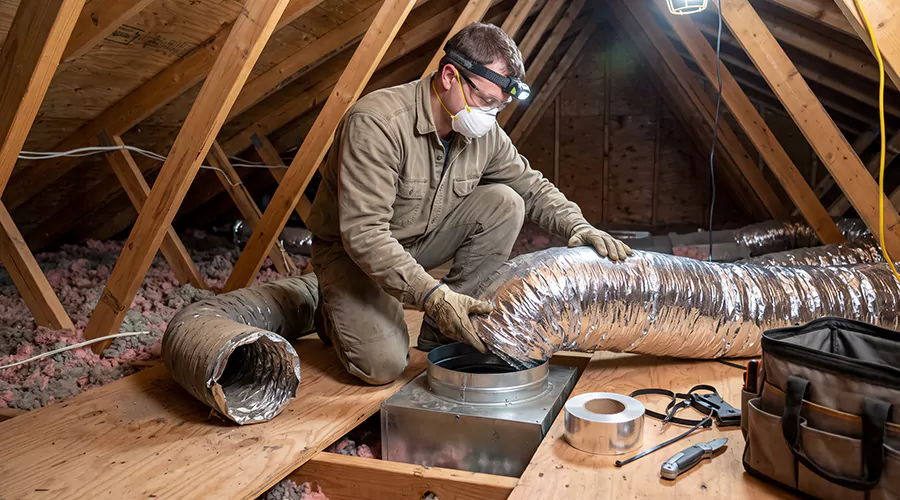
Replacing ductwork under a house involves inspecting the crawlspace, correcting moisture and access problems, removing damaged ducts, and installing properly sized replacement sections with secure supports, airtight connections, and suitable insulation. The completed duct network should be tested for leakage and airflow before normal HVAC operation resumes.
Many homes have heating and cooling ductwork installed beneath the first floor. These systems may include rigid metal trunks and insulated flexible branches connected to floor registers. The ducts carry conditioned air through a crawlspace that may be cooler, warmer, or more humid than the living areas above.
Over time, crawlspace ductwork can develop damage from water exposure, physical contact, corrosion, or inadequate support. Flexible ducts may sag onto the ground or become crushed near floor framing. Metal joints can also separate, allowing conditioned air to escape before it reaches the intended rooms.
Replacing under-house ducts requires particular attention to the surrounding environment. A new duct installed above wet ground or beneath a leaking pipe may develop problems if the original moisture source remains. Proper replacement therefore involves both the HVAC installation and the conditions affecting the crawlspace.
When Should You Replace Ductwork Under a House?
Under-house ductwork needs replacement when its condition prevents a durable repair or normal airflow. Severely rusted metal sections and collapsed flexible ducts are common examples. Wet or mold-contaminated fiberglass duct materials can also require replacement rather than ordinary cleaning. Our air duct repair service addresses less severe damage that can be repaired without full replacement.
However, a disconnected fitting does not automatically justify replacing an entire duct network. Sound metal connections can often be mechanically reattached and sealed. A flexible duct that has sagged but remains structurally intact may only need improved support and routing.
A qualified inspection should identify the actual damage before replacement is recommended. The contractor should distinguish between an air leak, a physical obstruction, and a moisture-related material problem. These conditions require different repairs.
Common Signs of Damaged Crawlspace Ductwork
Duct problems beneath a house may be difficult to see from occupied rooms. Residents often notice weak airflow or uneven temperatures before discovering the damaged material. These symptoms warrant inspection but do not prove that replacement is necessary.
Look for the following conditions:
- Flexible ducts are resting in standing water.
- The inner liner has been crushed or torn.
- Metal ducts contain extensive rust or perforations.
- Duct connections have pulled apart.
- Insulation is wet or deteriorating.
- The exterior jacket of a flexible duct has extensive damage.
- Pests have damaged duct materials.
- Several branches are poorly supported or disconnected.
- Air is escaping from visibly damaged joints.
- A duct route contains permanent sharp bends.
- The existing passages are incorrectly sized.
- Repairs repeatedly fail because the material has deteriorated.
Weak room airflow can also result from a dirty HVAC filter or equipment problem. These simpler conditions should be evaluated before substantial duct replacement begins.
What Types of Ductwork Are Installed Under Houses?
Under-house duct systems commonly use rigid sheet metal or insulated flexible ducts. Some installations also contain duct board or internally insulated metal passages. The material affects how the duct should be supported and whether damage can be repaired.
| Duct Material | Typical Use Under a House | Main Concern |
|---|---|---|
| Galvanized sheet metal | Main trunks and rigid branches | Corrosion and leaking joints |
| Insulated flexible duct | Branches connecting trunks to floor registers | Sagging, crushing, and liner damage |
| Fiberglass duct board | Selected main ducts and distribution sections | Moisture and structural damage |
| Internally insulated metal duct | Systems requiring internal insulation | Wet or deteriorated lining |
| Pre-insulated rigid duct products | Approved specialized installations | Connection and moisture requirements |
Flexible ducts are useful for certain branch connections because they can bend around framing. However, their flexibility makes them more vulnerable to poor support and compression. A metal trunk may be preferable where the route needs to remain rigid or support several branches.
The selection should follow the HVAC design and local building requirements. Flexible duct should not be used to bypass a sizing problem or forced into a space too narrow for the required airflow. Proper material selection helps the replacement perform reliably.
What Should You Check Before Replacing Crawlspace Ductwork?
The conditions under the house should be evaluated before damaged ducts are removed. Crawlspaces can contain hazards that are not present in an accessible basement. Moisture, electrical wiring, structural conditions, and unknown insulation materials may affect how the work can be completed.
Standing Water and Drainage
Standing water is an important warning sign because it can damage ducts and surrounding materials. The source may involve plumbing leaks, surface runoff, or groundwater intrusion. New insulated ducts should not be installed in a location where they will repeatedly become wet.
The water source should be identified and corrected before replacement. A drainage contractor or other specialist may be necessary when the problem extends beyond the HVAC system. Simply moving the new ducts slightly higher may not resolve persistent humidity or moisture damage.
A damp crawlspace can also affect the insulation and wooden framing. These conditions should be documented so the correct repairs can be coordinated.
Crawlspace Ground Vapor Barrier
Some crawlspaces have a ground vapor barrier designed to limit moisture movement from the soil. Tears or missing coverage can contribute to elevated humidity, depending on the crawlspace design and local climate. The barrier should be evaluated as part of the moisture assessment.
The appropriate solution depends on whether the crawlspace is vented, sealed, or conditioned. These approaches have different insulation and moisture-control requirements. A homeowner should not automatically block foundation vents or install encapsulation materials without evaluating the building's design and local requirements.
Duct replacement provides an opportunity to identify damaged ground coverings, but a complete crawlspace moisture project is a separate scope of work.
Electrical and Plumbing Hazards
Crawlspaces may contain electrical cables and plumbing pipes near the ductwork. Standing water can make electrical hazards more serious. Installation personnel should inspect the work route before entering or moving duct materials.
Exposed wiring and damaged electrical equipment should be addressed by qualified personnel. Duct replacement should not involve pulling against electrical cables or using plumbing pipes as structural supports. Nearby utilities must remain protected throughout the work.
A plumbing leak should be repaired before new duct insulation is installed beneath it. Otherwise, the replacement may become wet again.
Pest Activity
Rodents and other animals can damage flexible duct liners and insulation. They may also leave nesting debris or other contamination. If active pests are present, the problem should be addressed before ordinary installation proceeds.
A pest-control professional may need to remove an infestation and identify entry points. Damaged duct sections can then be replaced under appropriate conditions. Installing new material without correcting access points can allow repeated damage.
Suspected pest contamination should not be disturbed with an ordinary household vacuum. The cleanup method should reflect the type and extent of material present.
Asbestos and Other Older Materials
Older homes may contain insulation or duct wrapping that requires special assessment before disturbance. Asbestos-containing materials cannot be reliably identified by appearance alone. Cutting or pulling unfamiliar insulation can release hazardous fibers when such material is present.
The Environmental Protection Agency advises leaving suspected asbestos-containing materials undisturbed until they can be evaluated appropriately. Qualified assessment and specialized removal may be necessary before duct replacement begins.
A contractor should identify unusual materials during the initial inspection rather than discover them only after demolition has started.
What Tools and Materials Are Needed to Replace Ductwork Under a House?
The appropriate materials depend on whether the project involves flexible branches, rigid trunks, or both. The contractor should use products approved for the HVAC application and suitable for the crawlspace conditions. The installation must account for moisture, physical support, and air leakage.
| Material or Equipment | Main Purpose |
|---|---|
| Correctly sized replacement duct | Carries supply or return air |
| Suitable insulated flexible duct | Replaces applicable branch runs |
| Galvanized metal duct and fittings | Forms rigid trunks or branches |
| Approved mechanical clamps | Secure flexible liners |
| HVAC mastic and listed closure materials | Seal connections |
| Suitable duct insulation | Limits unwanted heat transfer |
| Vapor-barrier jacket materials | Protect insulation where required |
| Wide support straps or saddles | Keep ducts properly supported |
| Approved rigid duct hangers | Support heavier metal passages |
| Inspection lighting | Identifies damage and connections |
| Duct leakage testing equipment | Checks completed installation |
| Appropriate personal protective equipment | Supports safer access and handling |
A professional may also need temporary supports to prevent surrounding ducts from shifting during removal. The work should avoid putting weight on register boots and other fittings not designed to support the entire duct.
The exact fastening and insulation specifications should follow manufacturer instructions and applicable codes. A system installed in a vented crawlspace may require different moisture protection from one located inside a conditioned crawlspace.
How to Replace Ductwork Under a House Step by Step?
Under-house duct replacement should follow a planned sequence that accounts for both HVAC performance and crawlspace safety. The steps below describe how qualified installers approach a typical residential project. Homeowners should not enter a crawlspace containing standing water, exposed energized wiring, suspected hazardous material, or unsafe access conditions to attempt this work.
Step 1. Inspect the Crawlspace and Identify Hazards
The contractor begins by evaluating the access opening and conditions beneath the house. The inspection should identify standing water, exposed wiring, damaged insulation, pest activity, and any physical obstructions. The available clearance determines how equipment and replacement materials can be moved safely.
Poor ventilation and confined access can also affect working conditions. The contractor should determine whether additional safety measures or specialist work are required before entering. Duct replacement should not proceed through an unsafe environment simply to keep the original schedule.
The findings should be documented so necessary repairs can be arranged before installation begins.
Step 2. Inspect the Existing Duct Network
Identify the supply and return trunks and the branches connected to each floor register. Check for damaged metal and crushed flexible sections. The inspection should also locate loose connections or supports that have failed.
Photographs and measurements can help establish which ducts need replacement. A house may contain one deteriorated branch while the main trunk remains sound. Understanding the full network helps avoid unnecessary removal.
The contractor should also inspect the register boots and connections near the HVAC equipment. A replacement duct can leak when it is attached to an unstable fitting.
Step 3. Correct Water and Pest Problems
Any active water intrusion or pest infestation should be addressed before new materials are installed. Water from plumbing leaks or poor drainage can quickly affect replacement insulation. Pest entry points should also be repaired to limit repeated damage.
Some moisture problems require work by a plumber or building-envelope specialist. Crawlspace drainage and vapor-barrier improvements may be separate projects. The duct installer should coordinate the replacement with those repairs.
The objective is to place new ductwork in conditions that will not immediately damage it. Replacing ducts without correcting the source of deterioration can create unnecessary future expenses.
Step 4. Evaluate the Duct Design
The contractor determines whether the existing duct sizes and layout are appropriate for the heating and cooling system. Poorly performing ducts should not automatically be replaced with identical materials. ACCA Manual D provides recognized methods for residential duct design.
The evaluation considers the amount of air required by the rooms and the resistance of the proposed duct route. Flexible branches need gentle bends and suitable lengths. Main trunks and returns must also provide enough capacity for the equipment.
When the original system has significant design problems, a replacement plan may include different duct sizes or additional return pathways.
Step 5. Prepare the Installation Layout
Plan the location of each new duct and the supports required to keep it above vulnerable areas. The route should avoid unnecessary contact with the ground or nearby plumbing. Clearances and access to other building systems should also be maintained.
An effective layout reduces unnecessary bends and supports the ducts without excessive sagging. Rigid trunks may require hangers attached to appropriate framing. Flexible branches need wide support straps or saddles that do not compress the passage.
The layout should be reviewed before old materials are disconnected. This reduces the likelihood of improvising unsuitable routes while working in limited space.
Step 6. Confirm Permits and Applicable Requirements
Substantial duct replacement may require a permit or inspection under local building rules. The contractor should verify requirements before the work begins. Duct insulation ratings, support methods, and leakage testing may be governed by adopted energy or mechanical codes.
Manufacturer installation instructions also apply to the materials selected. Flexible duct support and connection requirements should not be ignored because the work is hidden beneath the floor.
The homeowner should ask whether required permits and inspections are included in the estimate.
Step 7. Shut Down the HVAC Equipment
Turn off the affected heating and cooling system before duct sections are opened. Qualified personnel should isolate electrical power where work near equipment requires it. The blower should not operate while parts of the distribution system are disconnected.
Fuel-burning equipment requires additional caution. Furnace combustion vents are not ordinary room-air ducts and must not be modified during supply or return duct replacement. Suspected combustion venting defects require qualified service.
The equipment should remain unavailable for normal operation until the connected ductwork has been restored.
Step 8. Remove the Damaged Ductwork
The installer carefully disconnects damaged sections from sound fittings and supports. Old duct material should be controlled during removal so insulation or debris does not spread into occupied spaces. The contractor should avoid placing additional stress on surrounding ducts that will remain.
Rigid metal sections may contain sharp edges, while flexible ducts can contain exposed wire reinforcement. Suitable protective equipment is necessary. Unknown insulation materials should not be torn or cut without appropriate evaluation.
After removal, the contractor should inspect the exposed connection points. Damaged collars and register boots can be replaced before new ductwork is installed.
Step 9. Prepare the Main Connections
Examine the air handler connection, supply trunk, return passages, and branch fittings. The connection points should be secure and compatible with the replacement ducts. Loose or deteriorated fittings must be corrected before the new material is attached.
A branch may have become disconnected because the original fitting was inadequately secured. Simply adding a new duct without repairing that connection can lead to another failure. The installer should identify the reason the original joint failed.
Any proposed change in duct diameter should be incorporated into the correct fittings. Forcing an undersized transition can create an unwanted restriction.
Step 10. Install New Main Ducts Where Necessary
When the project includes rigid trunk replacement, the new metal passages should be installed according to the approved design. They must be supported by appropriate hangers and remain clear of conditions that could damage them. Connections should be mechanically secured before sealing.
Main ducts should not rely on plumbing pipes or electrical conduits for support. Structural framing and other approved support arrangements are more appropriate. The route should also allow reasonable future maintenance access where practical.
The installer should check alignment and fitting dimensions before connecting the remaining branches. Correcting a trunk problem early is easier than after the entire system is attached.
Step 11. Install Flexible Branch Ducts
New flexible branches should be extended and routed without excessive loops or sharp bends. The inner liner must retain its intended circular passage. Compressing the duct beneath framing or allowing it to sag can reduce airflow.
The contractor should select a route that avoids standing water and protects the duct from physical contact. Where clearance is too limited for an appropriate flexible bend, a rigid fitting or alternative route may be needed. The duct should not simply be forced through the obstruction.
Each branch should reach its register boot without pulling aggressively against the connection. The replacement must remain stable after support straps are installed.
Step 12. Mechanically Secure and Seal Connections
Flexible duct inner liners should be secured to their collars using approved mechanical fasteners or drawbands. Suitable HVAC mastic or specified closure materials can then seal the air connection. Attaching only the exterior jacket is not sufficient.
Rigid metal joints also require appropriate fastening and sealing. Ordinary cloth-backed duct tape is not a durable permanent seal for these connections. All products should be compatible with the duct materials and installation requirements.
Return ducts deserve particular attention because leaks can draw air from the crawlspace into the HVAC system. A large return-side opening can introduce unwanted moisture and particles, depending on the building conditions.
Step 13. Install Proper Duct Supports
The completed ducts should remain securely supported and protected from the ground. The Department of Energy recommends wide straps or saddles for flexible ducts, generally at least 1.5 inches wide and spaced no farther than four feet apart. Sag should be limited to approximately half an inch per foot between supports, subject to manufacturer and code requirements.
Supports must not compress the duct liner or insulation. Tight narrow straps can create restrictions even when the duct appears securely attached. Additional supports may be necessary near bends and fittings.
Rigid metal ducts require support suitable for their weight and shape. The finished arrangement should avoid placing unnecessary loads on register boots or junction boxes.
Step 14. Restore Insulation and Vapor Protection
Ducts installed in unconditioned crawlspaces need insulation appropriate for local requirements. Insulation reduces unwanted heat transfer between conditioned air and the surrounding environment. A suitable vapor barrier can also help protect insulated cooling ducts from condensation.
Pre-insulated flexible ductwork normally includes an exterior jacket. After the inner liner is attached and sealed, the insulation and jacket must be restored across the connection. Gaps can reduce thermal performance and expose insulation to damp conditions.
Metal ducts may require separate insulation after the joints have been secured and sealed. The contractor should confirm that the insulation rating meets the applicable requirements for the location.
Step 15. Inspect Floor Register Boots
Under-house ducts often connect directly to floor register boots. These fittings should be supported and sealed where appropriate. A loose boot can allow conditioned air to escape into the floor cavity or crawlspace.
The connection between the duct and boot should not be carrying excessive unsupported duct weight. A secure boot also helps prevent movement when the floor register is handled during ordinary cleaning.
Any damaged register covers or loose flooring connections should be identified separately. The completed installation should allow normal airflow into the occupied room.
Step 16. Test the Ducts for Leakage
A professional duct leakage test can identify air escaping through joints or damaged sections. This is particularly useful for under-house installations because leaks may remain out of sight after the crawlspace is closed. Testing helps confirm the quality of the completed connections.
The acceptable leakage level depends on the adopted code and the type of testing performed. A contractor should explain the method and results. Significant leakage should be corrected before the replacement is accepted.
Visual inspection alone may miss small openings at concealed fittings. Performance testing provides additional evidence that the new network is airtight.
Step 17. Check Airflow and HVAC Operation
Restore normal equipment operation only after all duct sections have been connected and inspected. The contractor should check airflow at the registers served by the replacement system. Static pressure measurements may also be appropriate when the project involves substantial redesign.
Rooms that previously had weak airflow should be evaluated to determine whether the replacement corrected the problem. If airflow remains inadequate, the duct route or equipment conditions may need further adjustment.
The finished system should provide suitable airflow without unusual leakage or noise. These operating checks are part of a complete replacement rather than optional housekeeping.
Step 18. Clean Up and Document the Work
Old duct materials and installation debris should be removed according to the project agreement. Any disturbed crawlspace vapor barrier or insulation should be restored appropriately. Access openings should also remain secure.
The contractor should provide a description of the ducts replaced and any design changes. Photographs can be useful because the completed system is often difficult for homeowners to inspect. Leakage and airflow results should be supplied when those tests were included.
This documentation helps support future maintenance and makes it easier to identify the new duct materials if repairs are needed later.
How Should Ductwork Be Supported Under a House?
Ductwork beneath a house needs support that keeps the passages in their intended shape. Flexible ducts should not hang in deep loops or become compressed by narrow straps. Rigid metal ducts also need hangers sized for their weight and dimensions.
The U.S. Department of Energy's Building America guidance recommends flexible duct supports no farther than four feet apart under typical horizontal installation conditions. Supports should be at least 1.5 inches wide, with limited sag between them. Manufacturer instructions and local requirements may be more restrictive.
Support locations should also account for connection points and bends. A flexible branch may require additional support immediately after a collar to prevent a sharp turn. The supports should attach to suitable framing rather than plumbing pipes or exposed electrical equipment.
In a damp crawlspace, maintaining separation from wet ground is especially important. A duct that rests in standing water may suffer damage even when its supports are otherwise adequate.
Should You Use Flexible or Metal Ductwork Under a House?
Both materials can be appropriate when properly designed and installed. Flexible ductwork is convenient for branch connections around framing, while rigid metal is commonly used for main trunks. A combined system may offer a practical balance of routing flexibility and durability.
| Feature | Flexible Ductwork | Rigid Metal Ductwork |
|---|---|---|
| Common use | Branch runs | Main trunks and rigid branches |
| Routing | Can follow gentle curves | Requires fittings for changes in direction |
| Physical durability | More vulnerable to crushing and tearing | More resistant to physical damage |
| Support needs | Wide, closely spaced supports | Suitable metal duct hangers |
| Airflow | Sensitive to compression and excessive bends | Smooth passage when properly designed |
| Insulation | Often factory insulated | May require separate insulation |
| Replacement labor | Often less for suitable branches | Can involve more fitting work |
Flexible duct should not be selected simply because it can be squeezed into a narrow space. A compressed passage may perform poorly despite appearing to fit. Proper sizing and installation are more important than the material's initial price.
In crawlspaces with repeated moisture exposure, the contractor should consider how each material and insulation system will be protected. No duct material should be treated as a substitute for correcting significant water intrusion.
How Much Does It Cost to Replace Ductwork Under a House?
Replacing ductwork in a crawlspace commonly costs approximately $2,600 to $7,300 in Angi's 2026 estimates. HomeGuide reports a similar range of $3,000 to $7,300 for crawlspace ductwork replacement. The amount depends on the size of the duct system and how easily installers can access it.
Smaller projects involving one damaged branch can cost considerably less than a complete replacement. However, very low clearance or additional moisture-related work can increase the price. The quote should identify the duct replacement separately from any crawlspace drainage or encapsulation project.
| Under-House Duct Project | Indicative U.S. Cost |
|---|---|
| Crawlspace ductwork replacement in Angi's 2026 estimates | $2,600–$7,300 |
| Crawlspace replacement in HomeGuide's estimates | $3,000–$7,300 |
| General residential duct replacement | $25–$55 per linear foot in one published pricing model |
| Crawlspace duct repair | $450–$2,400 for many projects |
| Additional moisture or pest remediation | Separate inspection and quote |
These figures describe different project scopes and should not be added together. A crawlspace repair may be sufficient when the damage is localized, while a major replacement requires substantially more materials and labor.
The contractor should explain which ducts are being removed and whether new insulation, supports, and testing are included. A quote covering the duct materials alone does not represent the cost of a completed system.
Is It Better to Repair or Replace Under-House Ductwork?
Repair is appropriate when the duct remains structurally sound and the defect can be corrected durably. A loose metal seam may be secured and sealed, while a sound flexible duct may be repositioned and supported. These repairs can restore normal operation without removing the entire section.
Replacement is more appropriate when the duct has collapsed or become severely corroded. Wet or moldy fiberglass duct material may also need removal and replacement. A contractor should not cover these conditions with ordinary sealing tape and treat the underlying problem as resolved.
A mixed approach is often practical. Damaged flexible branches may be replaced while sound metal trunks remain. The installer should also repair the connections and conditions that contributed to the original damage.
How Long Does Under-House Duct Replacement Take?
Replacing a few accessible branches may take part of a working day. A larger crawlspace duct replacement project may require one to three days or longer, depending on access and the amount of ductwork involved. Moisture remediation or major redesign can extend the overall schedule.
Restricted working clearance often slows the installation. Workers must also plan safe movement around plumbing, wiring, and structural supports. A project requiring additional access openings may involve more work than an exposed basement installation.
The contractor should allow time for sealing and testing rather than focusing only on removal and installation. A new duct network that has not been checked for leakage may still waste conditioned air. The project schedule should reflect the complete work.
Can You Replace Ductwork Under a House Yourself?
Under-house duct replacement is generally better suited to a qualified HVAC contractor. Crawlspaces may contain standing water, electrical hazards, pest contamination, and hazardous older insulation materials. Limited access can also make it difficult to install and support ducts correctly.
A homeowner should not enter a crawlspace when conditions are unsafe. Water near electrical equipment and unknown contaminated materials require specialized precautions. Some spaces may also have unsafe air conditions that demand professional assessment.
Even when the space is dry and accessible, duct sizing and sealing require care. An improperly installed return connection can draw undesirable air from beneath the home. Professional installation and testing help identify these problems before normal equipment operation resumes.
What Mistakes Should You Avoid During Crawlspace Duct Replacement?
Under-house installations can develop recurring problems when the surrounding conditions are ignored. Replacing ductwork without controlling active water intrusion is a common example. Inadequate supports and poorly sealed connections can also create new airflow problems.
Avoid these mistakes:
- Installing new ducts above standing water without correcting the source.
- Allowing flexible ducts to rest directly in wet soil.
- Choosing an incorrect duct diameter.
- Installing sharp bends or excessive flexible duct length.
- Supporting ducts with narrow wire that compresses insulation.
- Attaching only the outer jacket instead of the inner liner.
- Using ordinary cloth-backed duct tape as a permanent seal.
- Leaving return duct connections unsealed.
- Failing to restore insulation and vapor barriers.
- Blocking required crawlspace ventilation without a proper design.
- Disturbing suspected asbestos-containing materials.
- Ignoring pest entry points and damaged duct coverings.
- Using plumbing pipes or electrical conduits as duct supports.
- Confusing furnace combustion exhaust with supply ductwork.
- Restarting the HVAC system before all ducts are connected.
- Skipping leakage and airflow testing.
These problems can reduce the value of a new duct installation. Proper work addresses both the physical ducts and the environmental conditions surrounding them.
How Can You Protect New Under-House Ductwork?
Protecting under-house ductwork begins with managing moisture. Plumbing leaks and drainage problems should be repaired promptly. The crawlspace's ground vapor barrier and moisture-control strategy should remain suitable for the building.
Duct supports should be inspected periodically for damage or movement. A broken hanger can allow a flexible branch to sag or touch the ground. Repairing the support before the duct becomes crushed may prevent another replacement.
Pest control and maintenance of the crawlspace access opening can also reduce physical damage. During future plumbing or electrical work, contractors should avoid moving or compressing existing ducts. The duct system should remain sealed and properly insulated after nearby work is completed.
Include accessible crawlspace ducts in routine HVAC inspections. The technician can look for damaged jackets and loose connections while checking other equipment. Early detection helps keep localized defects from becoming larger repair projects.
When Should You Call an HVAC Contractor?
Call an HVAC contractor when under-house ductwork has visible structural damage or persistent airflow problems. A qualified installer can identify which sections need replacement and whether the existing system requires redesign. The contractor should also recognize conditions that require a plumber, electrician, or moisture specialist before duct installation begins.
Ask for a written proposal identifying the duct lengths, materials, and insulation ratings. The quote should describe support and sealing methods and any required leakage testing. Photos of damaged sections can help explain why replacement is recommended.
A substantial duct project should address the entire affected airflow path. Replacing a supply branch without correcting a damaged return connection may leave other problems unresolved. The contractor should evaluate how the new ducts will work with the existing HVAC equipment.
Conclusion
Replacing ductwork under a house requires careful inspection and planning because crawlspace conditions can damage both existing and new materials. Moisture and pest problems should be corrected before installation. New ducts must be properly sized and supported, with secure connections and appropriate insulation. Professional leakage and airflow testing help confirm that the replacement system operates as intended. Before starting, arrange an inspection that evaluates both the ductwork and the condition of the crawlspace.